Recently someone posted a topic to ask about safe sources to download data to practice processing. As a new astrophotographer I am getting a lot from this forum and sadly cannot (yet) contribute much so I came up with this idea to give something back.
I am sharing data for anyone to download and practice with. In return I only ask the following:
- Post a reply here if you download it so I know it is being used.
- Upload your result here on Astrobin and post a link and your processing workflow back here.
- If you post your results anywhere else or share the data please give me and Astrobin proper credits by specifiying the data was originally shared by Eric Gagne on Astrobin.
About number 2. This is the whole point here. My hope is that everyone who processes this data will share their results and processing workflow so a discussion about it can be had where we are all using the same data making it easier to compare the results.
This could be extremely beneficial for beginners (like me) but I am sure experienced astrophotographers might also lear of few tricks if a good discussion follows.
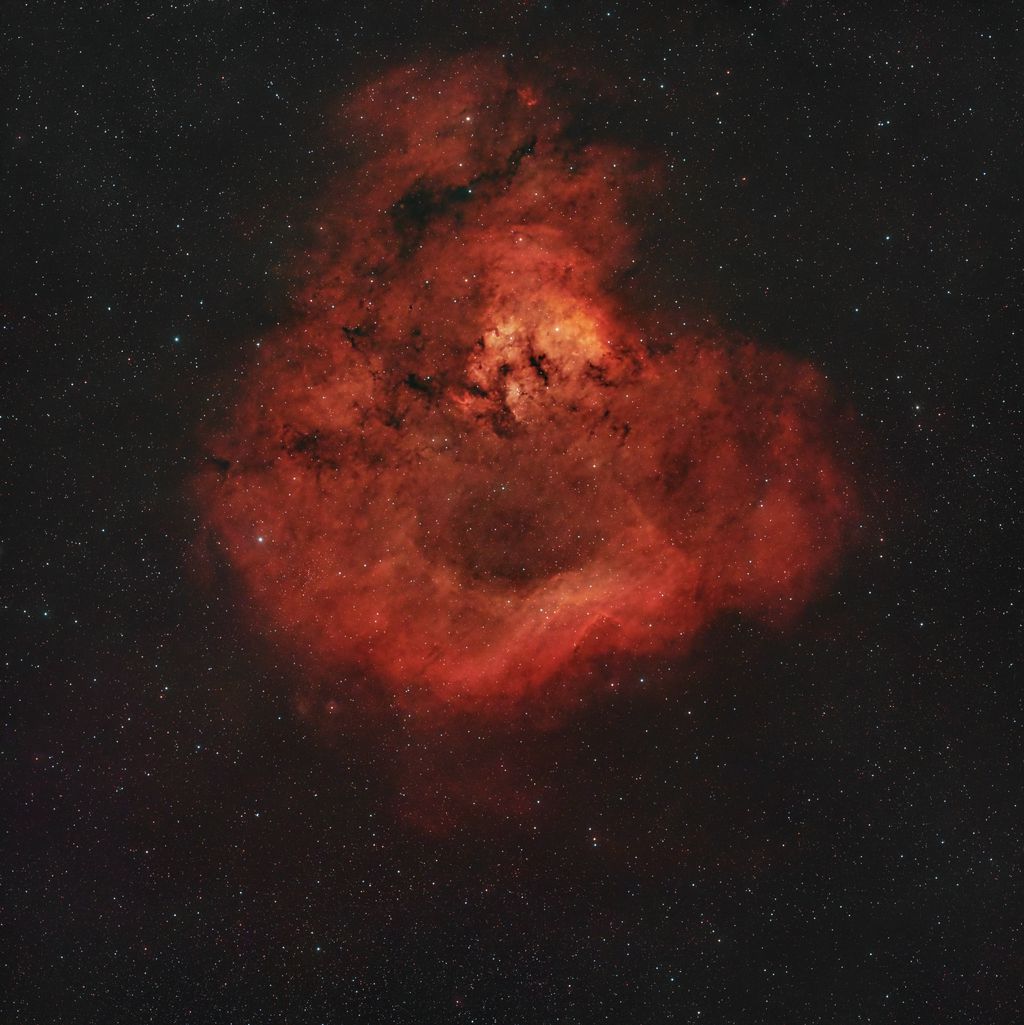
About the data. This is a set of images of NGC-7822 that I captured over 3 nights using a ZWO ASI533MC Pro with a Samyang 135mm lens, a Optolong L-Enhance filter with an Asiair Plus, Autofocuser and Autoguiding. All shots were taken at -20 degrees celcius.
If you download it you will get (all fits files):
- A master dark
- 25 Flats
- 25 Dark Flats
- 172 five minutes exposures
If you wondering how good the data is ? Well it's far from being perfect, 2 of the 3 nights had a 50% moon so there is gradient. None of it has been processed in any way nor has it been blinked to remove bad frames, some of them are partially or fully covered with clouds. It is just as it would be if you were just pulling it out of your own camera.
So here's the link, let's have a little and an instructive discussion: https://drive.google.com/drive/folders/1DEraKNJQtdFM-3MePIbGLovAFaiZ94I6?usp=sharing |
You cannot like this item. Reason: "ANONYMOUS".
You cannot remove your like from this item.
Editing a post is only allowed within 24 hours after creating it.
You cannot Like this post because the topic is closed.
|
Been cloudy for 3 weeks now, i think ill give this a go since not getting any data of my own, and post the results here when finished.
|
You cannot like this item. Reason: "ANONYMOUS".
You cannot remove your like from this item.
Editing a post is only allowed within 24 hours after creating it.
You cannot Like this post because the topic is closed.
Hi Eric.
Thank you for uploading the data. I am downloading it to check whether I can help. Don't have much time, but I will process it and send the result to you. I am just an amateur, but I like collaborating with people.
It goes also the opposite way. If you want the masters of any of my images, just ask for them.
Thanks!
Guiem.
|
You cannot like this item. Reason: "ANONYMOUS".
You cannot remove your like from this item.
Editing a post is only allowed within 24 hours after creating it.
You cannot Like this post because the topic is closed.
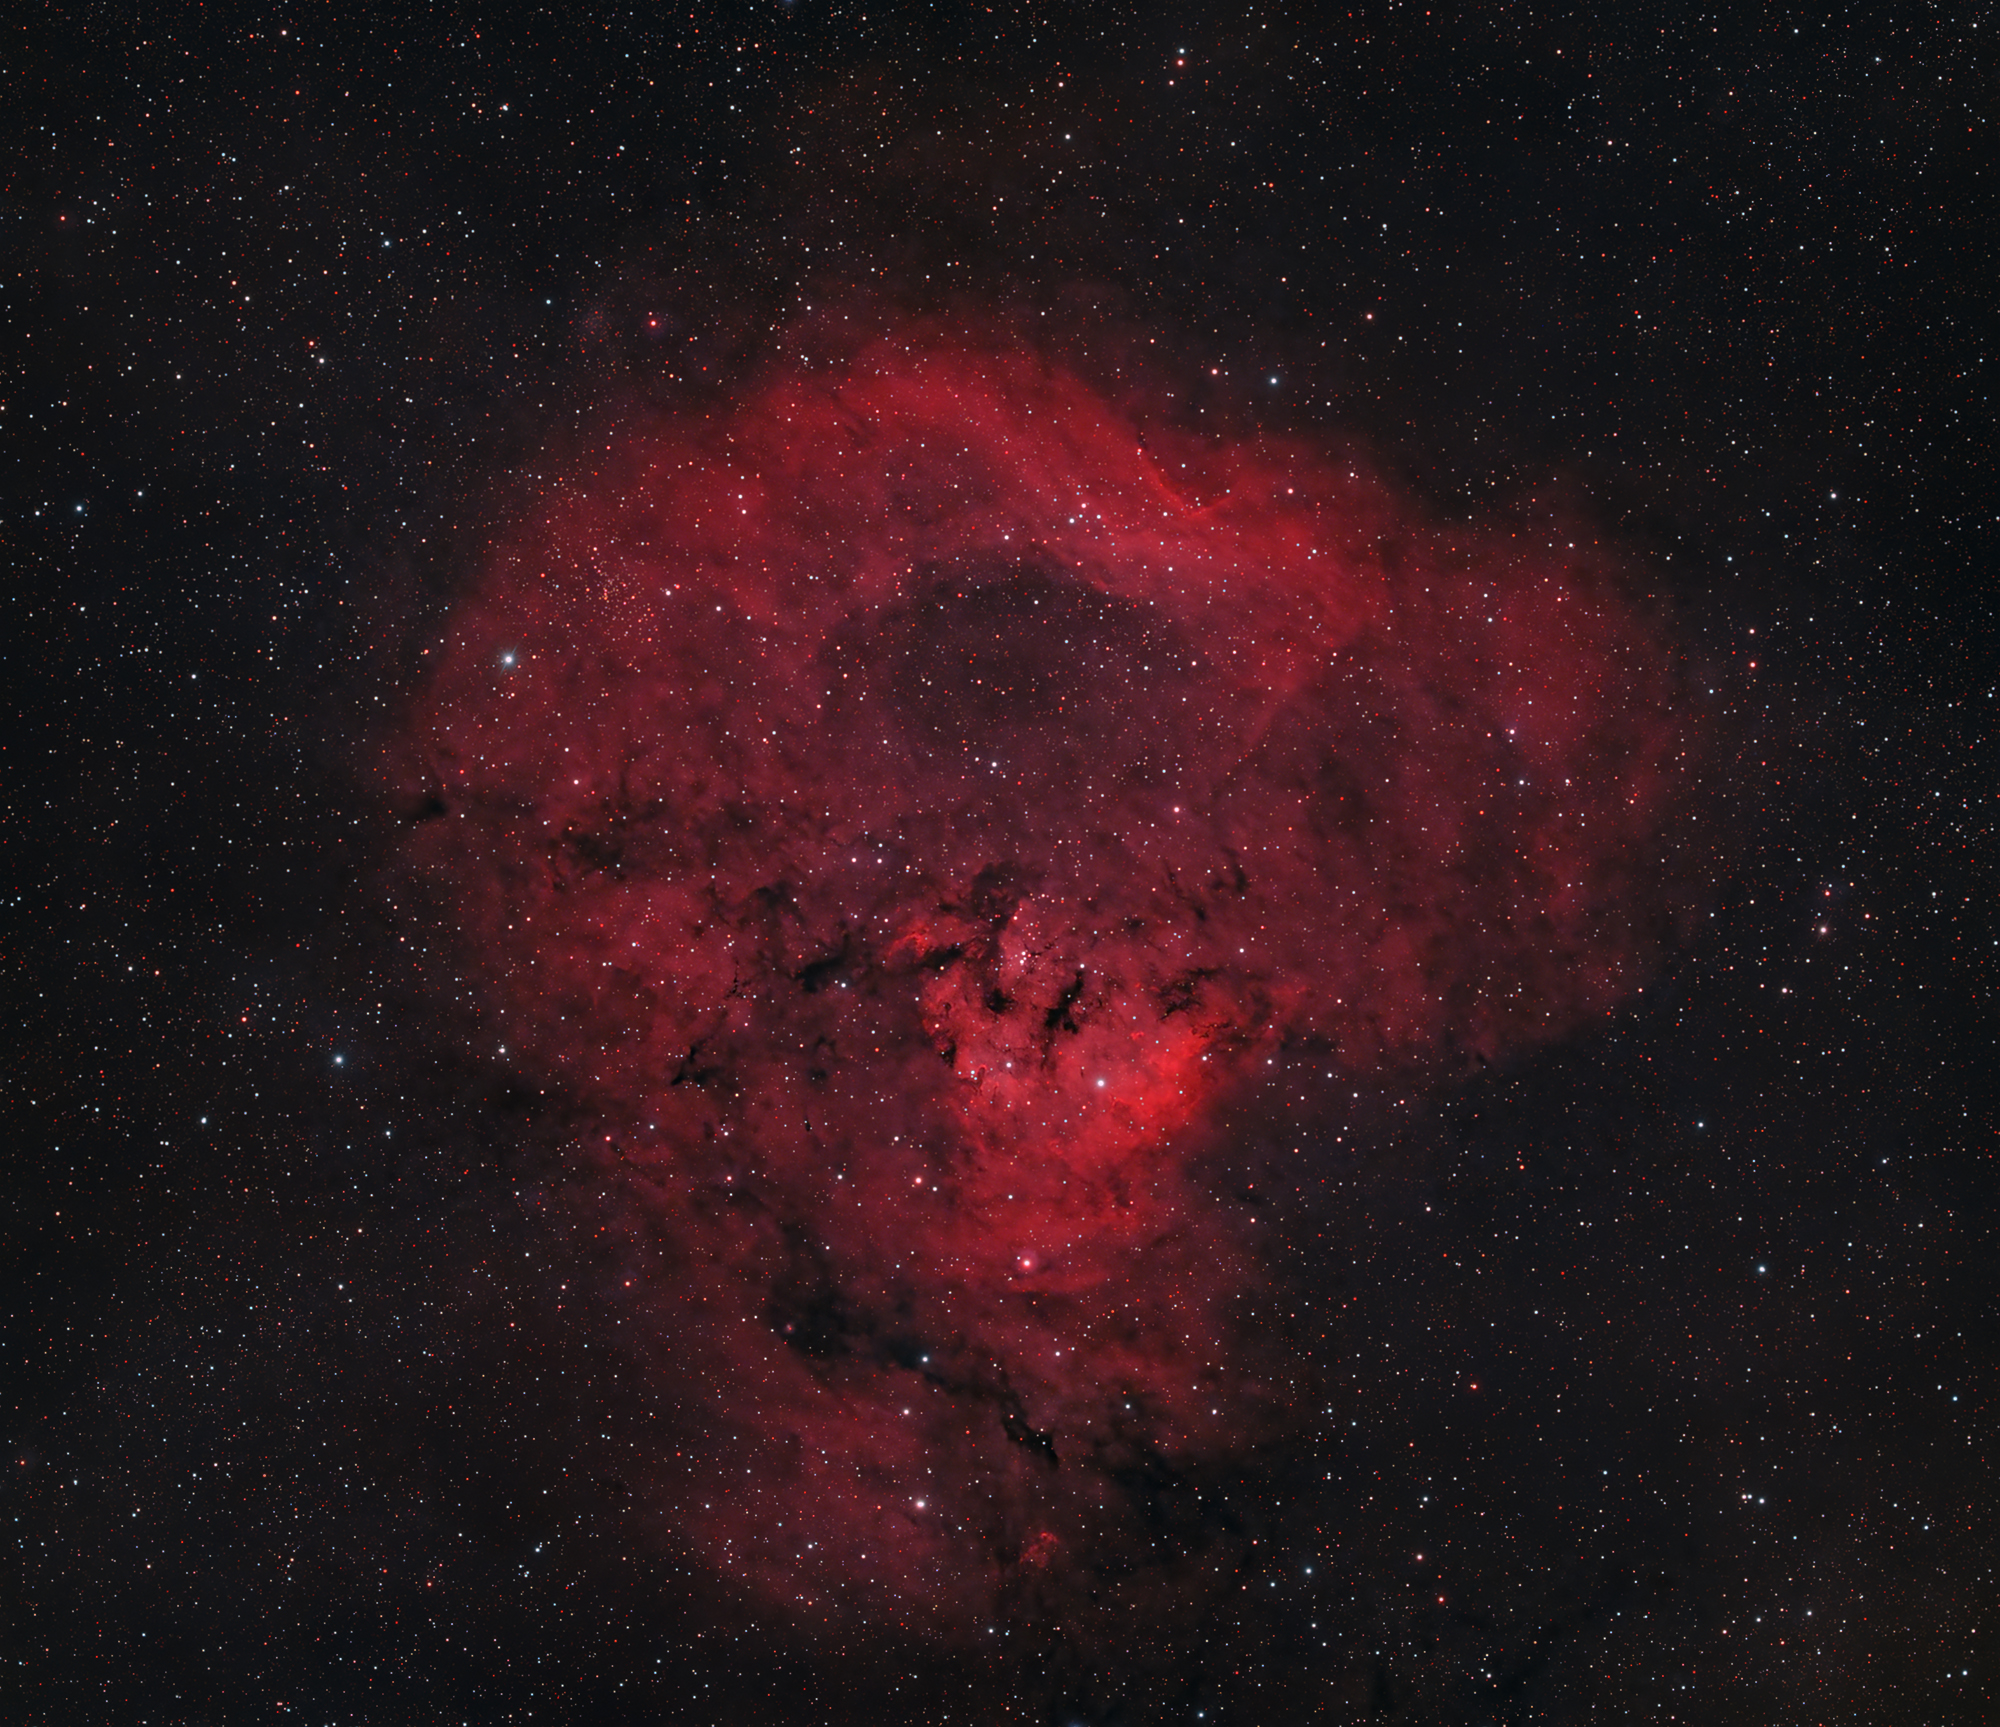
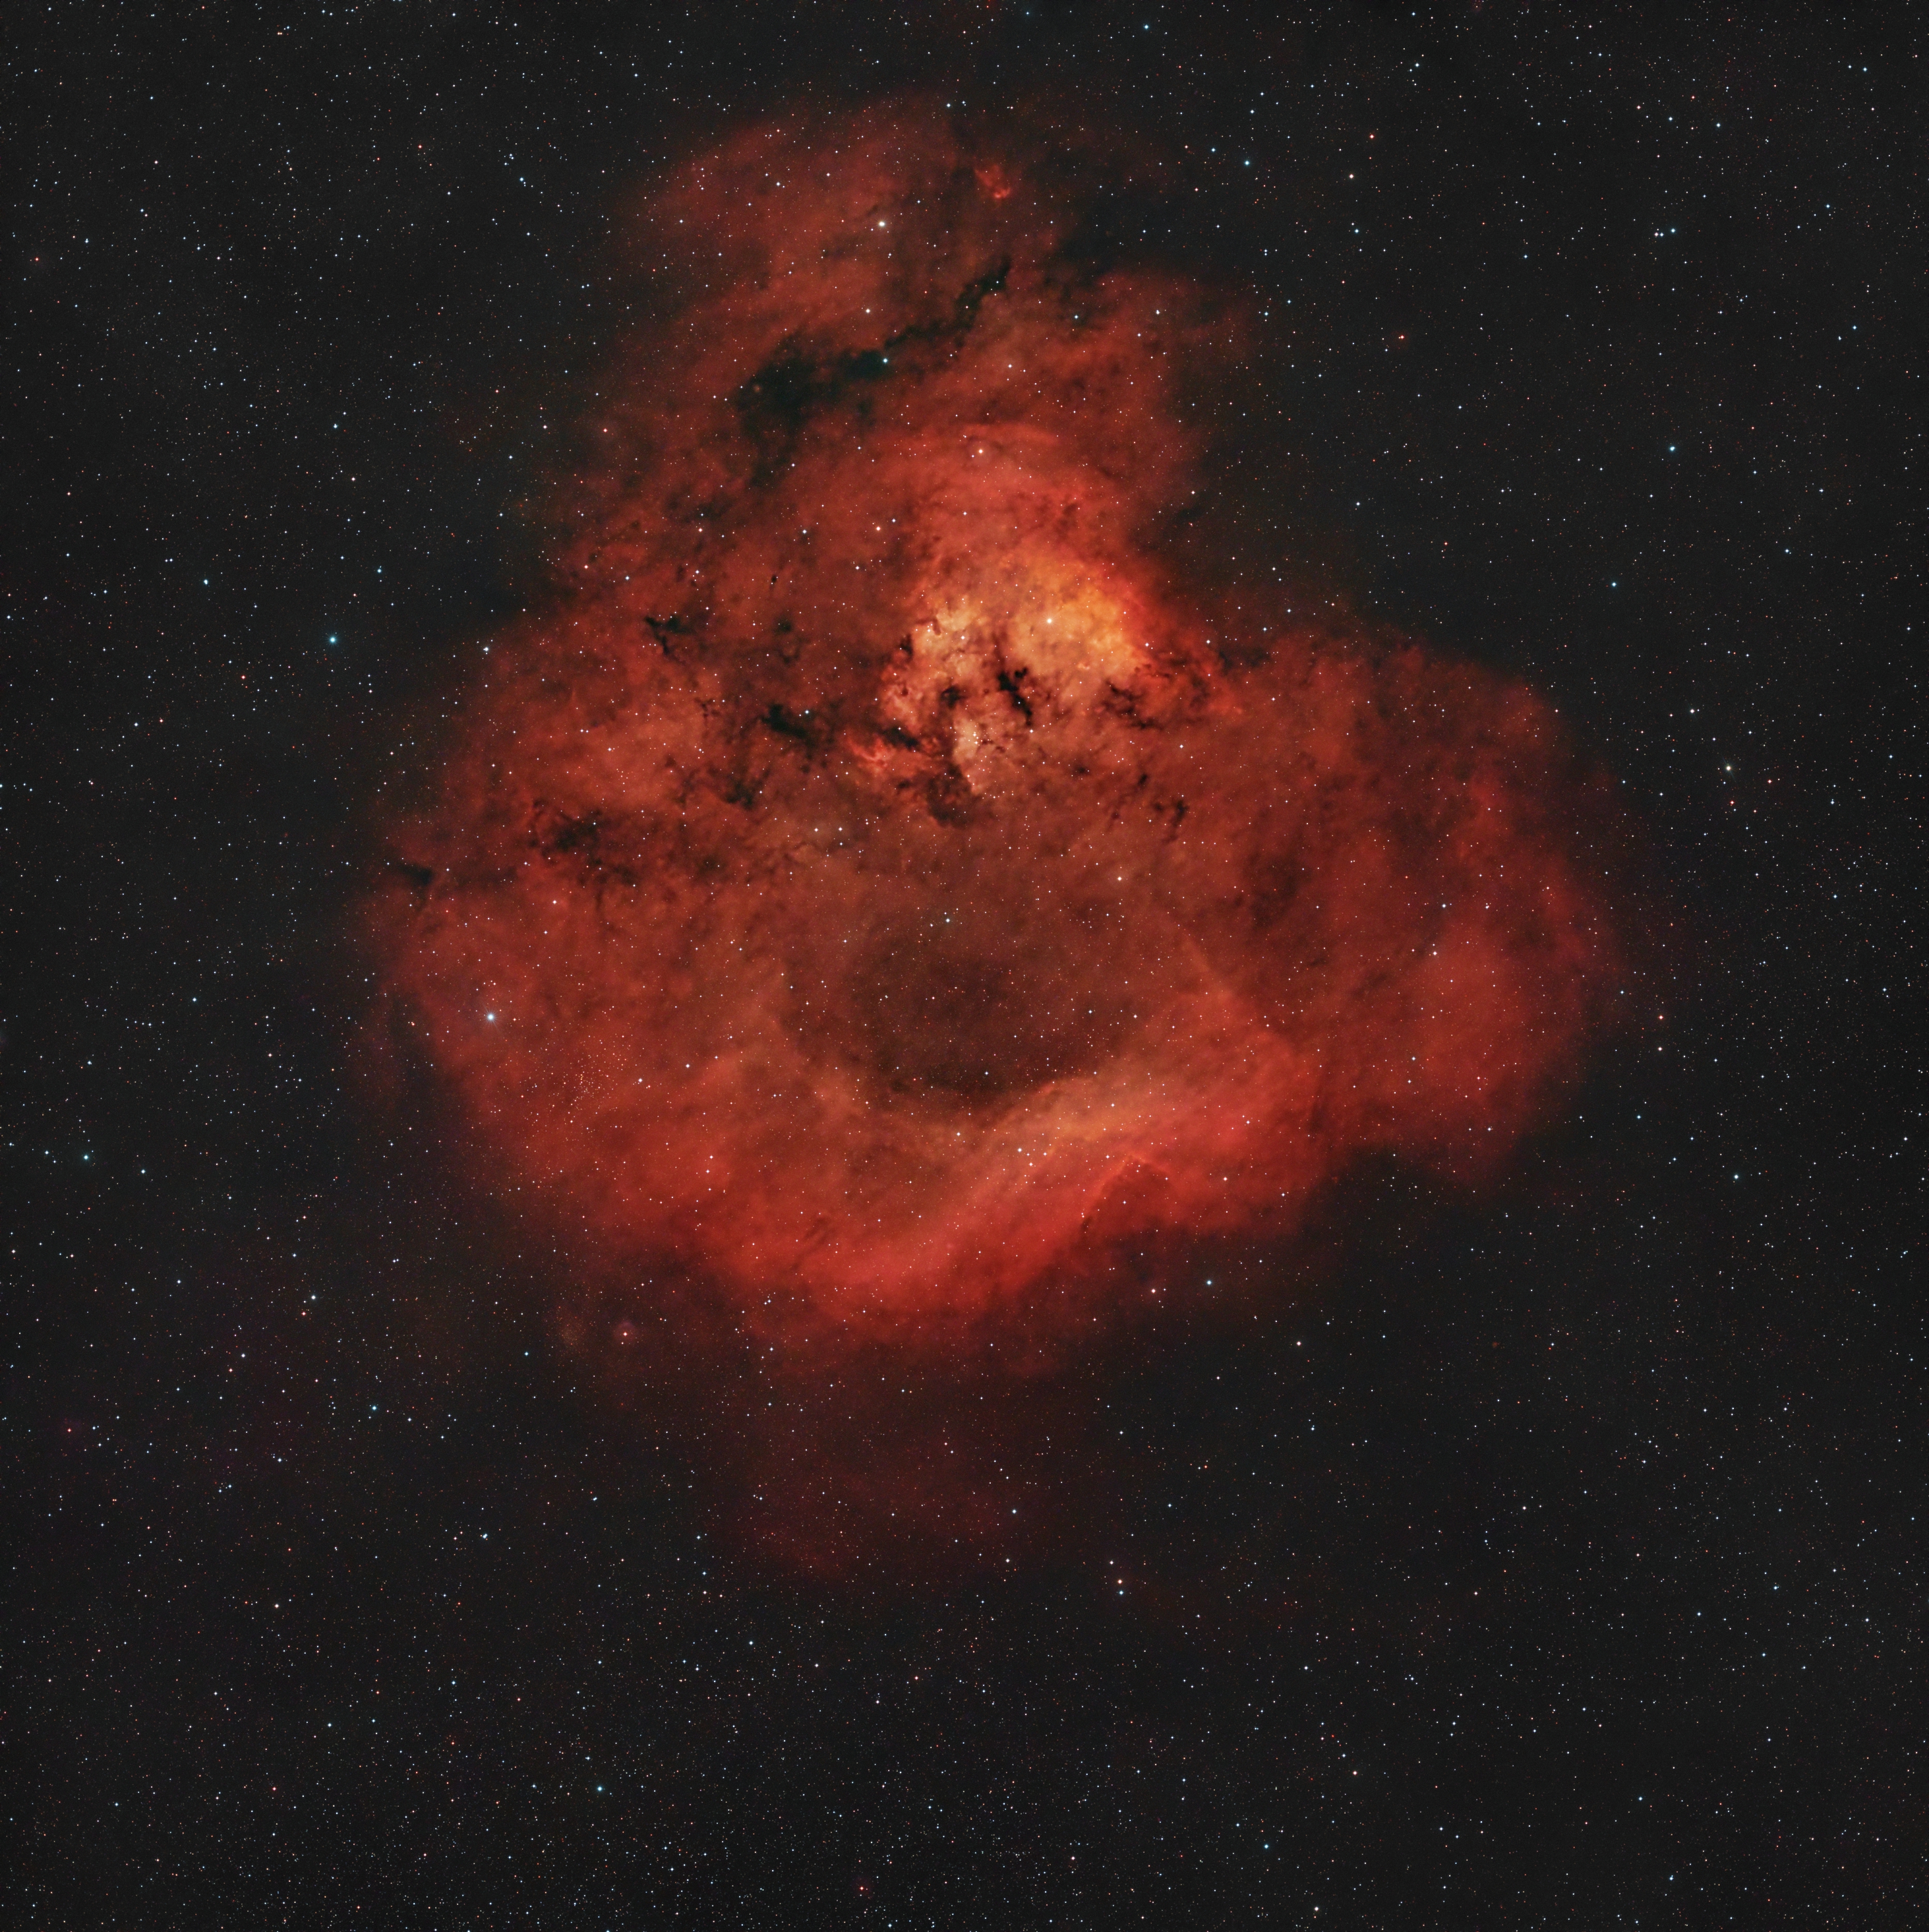
Here is what i got out of the dataset:

First impressions of the data is that its pretty good for the most part. Some is occluded by cloud and some has Moonlight intruding but there is still a good 10-12 hours of good data here after rejecting the worst ones so not a bad stack at all, would be satisfied with these for sure. One potential issue with your captures would be that it looks like you have not dithered at all, which results in hot pixels being present in the stack and i think some of the red small stars in the above image are in fact hot pixels that were not rejected because of no dithering. Running the cooler at -20 is also not at all necessary with the new sony sensors as the dark current is very low already at -10 (on average 1 electron per 32 minutes at -10c - so completely negligible). The downsides of running a camera too cool are also not very important, depending on how you power the setup since it will just use a little bit more power which may not be an issue.
I could create a bad pixel map from your attached dark master and it may solve the potential hot pixel issue, but ideally you would dither every now and then (maybe once per 20-30 minutes, just to break the pattern and allow rejection algorithms to scrap the outliers). I do calibration with a dark, a bad pixel map, and dither occasionally during imaging runs (20min intervals).
I calibrated, inspected and stacked the data in Siril utilizing the plot feature to remove statistical outliers such as the worst clouded ones. Then in PixInsight i applied SPCC, blurXt (luminance only) and started stretching with an Asinh transformation followed by a slight histogram transformation to bring the image to a point where i think stars are the size i would like them to be.
Then exported to Photoshop for the rest, which includes StarXterminator to remove stars (to be added later) and work on the Starless image. Further stretching for the starless layer with an attempt to boost the blue channel with curves to make some of the OIII better seen but not sure that was too successful. NoiseXt applied with layer masks at different strengths to the shadows and highlights to suit my taste, and then of course the usual saturation, levels adjustments, etc.
|
You cannot like this item. Reason: "ANONYMOUS".
You cannot remove your like from this item.
Editing a post is only allowed within 24 hours after creating it.
You cannot Like this post because the topic is closed.
Oskari thank you. You're right, I didn't dither. I haven't tried it yet simply because I still don't know what logic I should apply to decide by how many pixels and how often it should be done. I also have no idea at this time whether it changes anything in the way to stack the images.
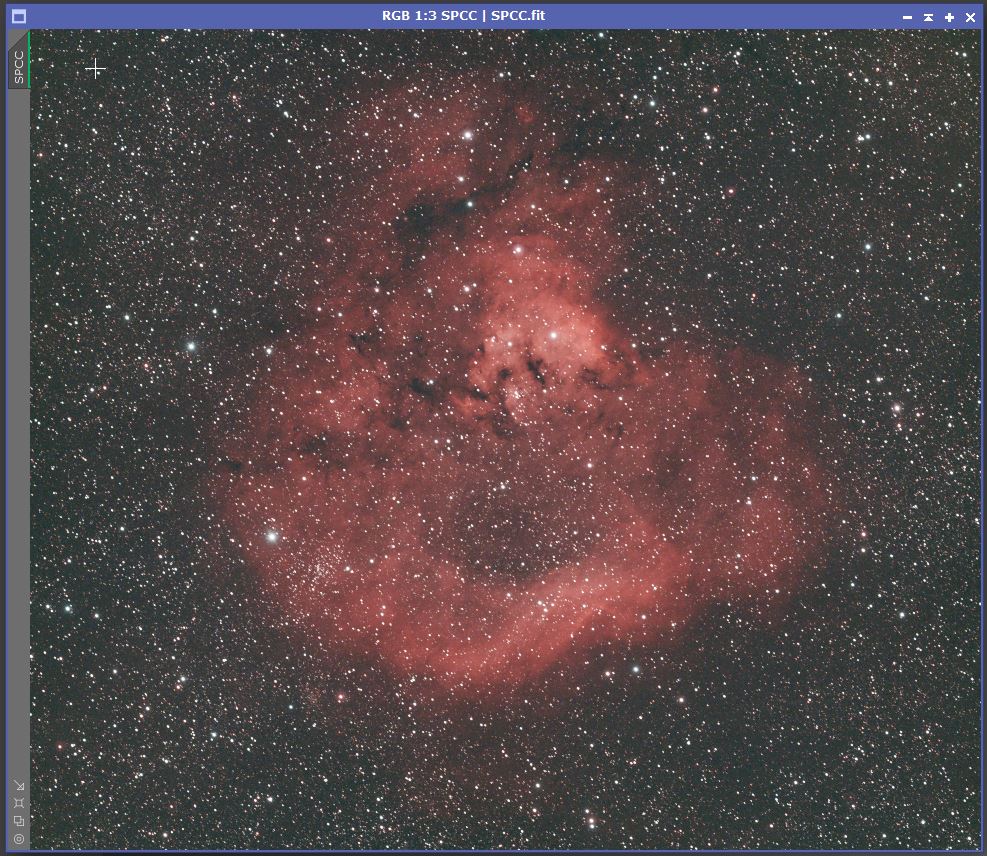
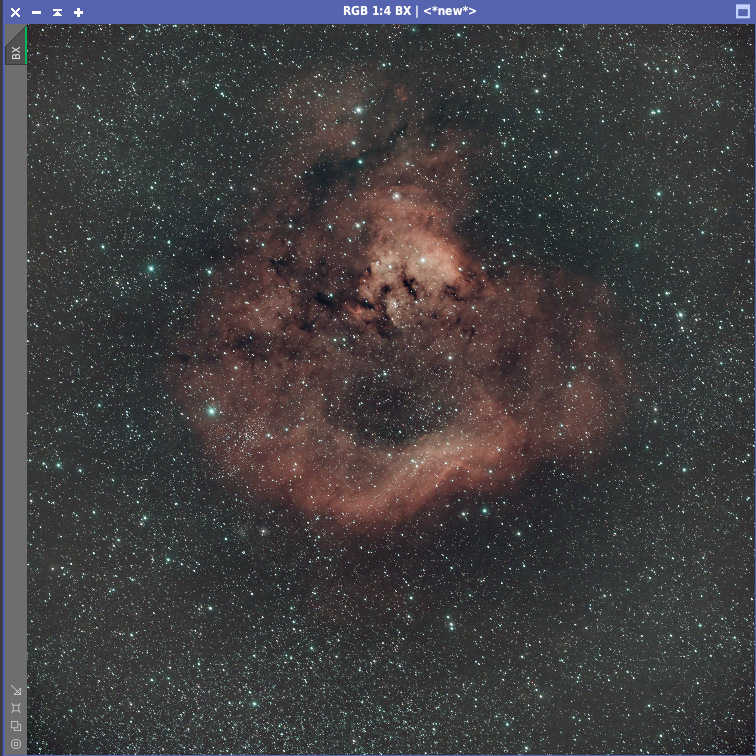
You did a better job than me with the background. I can't figure out how to make it darker. I am using/learning PixInsight. This is what I get after SPCC, ABE (DBE gives me the same result), NoiseXterminator and BlurXterminator.
When I try to make it darker by stretching I lose the nebula as well.
 |
You cannot like this item. Reason: "ANONYMOUS".
You cannot remove your like from this item.
Editing a post is only allowed within 24 hours after creating it.
You cannot Like this post because the topic is closed.
Eric Gagne:
Oskari thank you. You're right, I didn't dither. I haven't tried it yet simply because I still don't know what logic I should apply to decide by how many pixels and how often it should be done. I also have no idea at this time whether it changes anything in the way to stack the images.
You did a better job than me with the background. I can't figure out how to make it darker. I am using/learning PixInsight. This is what I get after SPCC, ABE (DBE gives me the same result), NoiseXterminator and BlurXterminator.
When I try to make it darker by stretching I lose the nebula as well.
Dithering with an OSC camera is typically given the recommendation of 10 or so pixels. Its not an exact science of 10, just go above that. Too much above and you will of course start to lose sensor area (because you need to crop the incomplete edges off in the end). My advice would be to set the dither to happen every 20 minutes, or 4 subs if you keep taking 5min exposures. Used to be that dithering needed to be more frequent, but i really dont think its the case with the new cameras (like your 533) that have next to none in terms of fixed pattern noise, which is what dithering will aim to remove.
For stacking issues, not really anything to worry about. If you dither 20 pixels, you will lose at least 20 pixels of useful image from every edge of the image. Star alignment will figure out the differences in where the image is pointing on its own, so nothing extra to worry about. (WBPP will figure everything out dither or no dither).
Used DBE too, forgot to mention that. How many samplers are you placing when trying with DBE? It looks like there may be too many in your example here, because we see this kind of darkened ring around the nebula which can happen with too many samplers - or poorly placed ones. ABE often does that mistake with images that contain a lot of stuff, like most nebulae that more or less fill the image (it works well for simple images, like a galaxy in the center of the image with nothing of interest around it). I used only 6 samplers for the background in mine, roughly in each corner and then a couple others where they seemed to fit nicely. Well away from the nebula in the center - no need or want to put samplers close to it. For the settings, the only thing i changed was to set tolerance to 1.0 from the default 0.5 and the resulting image appears to be very flat in terms of gradient.
This is what the image looked like during my process after applying DBE and SPCC, with the auto STF:

This part of the process - gradient removal - is very important for preservation of shadow detail and one you should spend some time on. Usually with DBE less is more, so fewer samplers rather than many samplers. And none of them on stars or nebulosity. In an image like this where realistically there is at least a little bit of faint nebulosity all over the place you have to choose the least worst spots, basically just the darkest areas. It helps to put the image in the extreme STF mode for this step, so you can see the background better.
|
You cannot like this item. Reason: "ANONYMOUS".
You cannot remove your like from this item.
Editing a post is only allowed within 24 hours after creating it.
You cannot Like this post because the topic is closed.
I went completely the other way around. For some reason I though the more samples you provide the better it will be at removing gradient. I guess I need to do some more reading on how DBE works. I managed to get something decent by playing with the other parameters, not knowing what I was doing, just doing trial and errors until I got something more or less acceptable. I will try again with only a few as you suggest. Thanks for the info on dithering, I will try that next time.
So here is my first version: https://astrob.in/1dcjx7/0/
All in PixInsight:
- WBPP with autocrop
- SPCC
- DBE
- NoiseXTerminator
- BlurXTerminator
- Some stretching and curves
- StarReduction Script (Bill Blanshan)
- NarrowBandNormalization (Bill Blanshan)
- ScreenStars (Bill Blanshan)
|
You cannot like this item. Reason: "ANONYMOUS".
You cannot remove your like from this item.
Editing a post is only allowed within 24 hours after creating it.
You cannot Like this post because the topic is closed.
Eric Gagne:
I went completely the other way around. For some reason I though the more samples you provide the better it will be at removing gradient. I guess I need to do some more reading on how DBE works. I managed to get something decent by playing with the other parameters, not knowing what I was doing, just doing trial and errors until I got something more or less acceptable. I will try again with only a few as you suggest. Thanks for the info on dithering, I will try that next time.
So here is my first version: https://astrob.in/1dcjx7/0/
All in PixInsight:
- WBPP with autocrop
- SPCC
- DBE
- NoiseXTerminator
- BlurXTerminator
- Some stretching and curves
- StarReduction Script (Bill Blanshan)
- NarrowBandNormalization (Bill Blanshan)
- ScreenStars (Bill Blanshan)
Out of curiosity, do you see the nebula in, mainly, red? Because isn't what I see on the posted link (more like grey-white). And, also, BTW, you were right to put a high number of sample points but what makes the difference is where they go, in other words what parameters you used to create the samples.
|
You cannot like this item. Reason: "ANONYMOUS".
You cannot remove your like from this item.
Editing a post is only allowed within 24 hours after creating it.
You cannot Like this post because the topic is closed.
andrea tasselli:
Out of curiosity, do you see the nebula in, mainly, red? Because isn't what I see on the posted link (more like grey-white). And, also, BTW, you were right to put a high number of sample points but what makes the difference is where they go, in other words what parameters you used to create the samples.
It is actually in a greyish/blueish palette. That is what NarrowBandNormalization does. It started as a PixelMath thing but a few months ago he made a full script of it. It "allows you to normalize SHO or HOO (or HOO from a OSC) data in a drag and drop process."
Narrowband Normalization | PixInsight Forum
I was tired of everything being red all the time so I decided to play with this.
|
You cannot like this item. Reason: "ANONYMOUS".
You cannot remove your like from this item.
Editing a post is only allowed within 24 hours after creating it.
You cannot Like this post because the topic is closed.
Eric Gagne:
I was tired of everything being red all the time so I decided to play with this.
It looks pretty weird (if you don't mind me saying so), more so if you're starting in the hobby. But to each his/her/their own...
|
You cannot like this item. Reason: "ANONYMOUS".
You cannot remove your like from this item.
Editing a post is only allowed within 24 hours after creating it.
You cannot Like this post because the topic is closed.
I don't mind at all. I invite you to download the data and show us what you do with it, that's what this thread is all about  |
You cannot like this item. Reason: "ANONYMOUS".
You cannot remove your like from this item.
Editing a post is only allowed within 24 hours after creating it.
You cannot Like this post because the topic is closed.
Eric Gagne:
I don't mind at all. I invite you to download the data and show us what you do with it, that's what this thread is all about
Here it goes:

Processing description to follow (it's lengthy)...
|
You cannot like this item. Reason: "ANONYMOUS".
You cannot remove your like from this item.
Editing a post is only allowed within 24 hours after creating it.
You cannot Like this post because the topic is closed.
|
Nice job Andrea. I see you too did a good job at removing moonlight
|
You cannot like this item. Reason: "ANONYMOUS".
You cannot remove your like from this item.
Editing a post is only allowed within 24 hours after creating it.
You cannot Like this post because the topic is closed.
You cannot like this item. Reason: "ANONYMOUS".
You cannot remove your like from this item.
Editing a post is only allowed within 24 hours after creating it.
You cannot Like this post because the topic is closed.
I downloaded the files and stacked them in APP. All of them , I did not sort at all. I could not load the Masterdark , it was greyed out for some reason but loaded all the flats and dark flats and lights.
It was so weird colored, like it had no calibration, I tried to remove the color gradients but to no avail and I just trashed the files.
I have a 533MC, I do no calibration at all with that camera and have good results.
I have used it with the 135mm Rokinon which I also own and did not like the results with a Radian triad filter but they were not as weird as these files.
I should have kept and posted but they were green and red and orange and awful.
Thanks for sharing, maybe for whatever reason they did not stack well in APP.
The stars were sharp and all the details in the Nebula looked good.
The gradients were beyond my Processing skills to fix.
|
You cannot like this item. Reason: "ANONYMOUS".
You cannot remove your like from this item.
Editing a post is only allowed within 24 hours after creating it.
You cannot Like this post because the topic is closed.
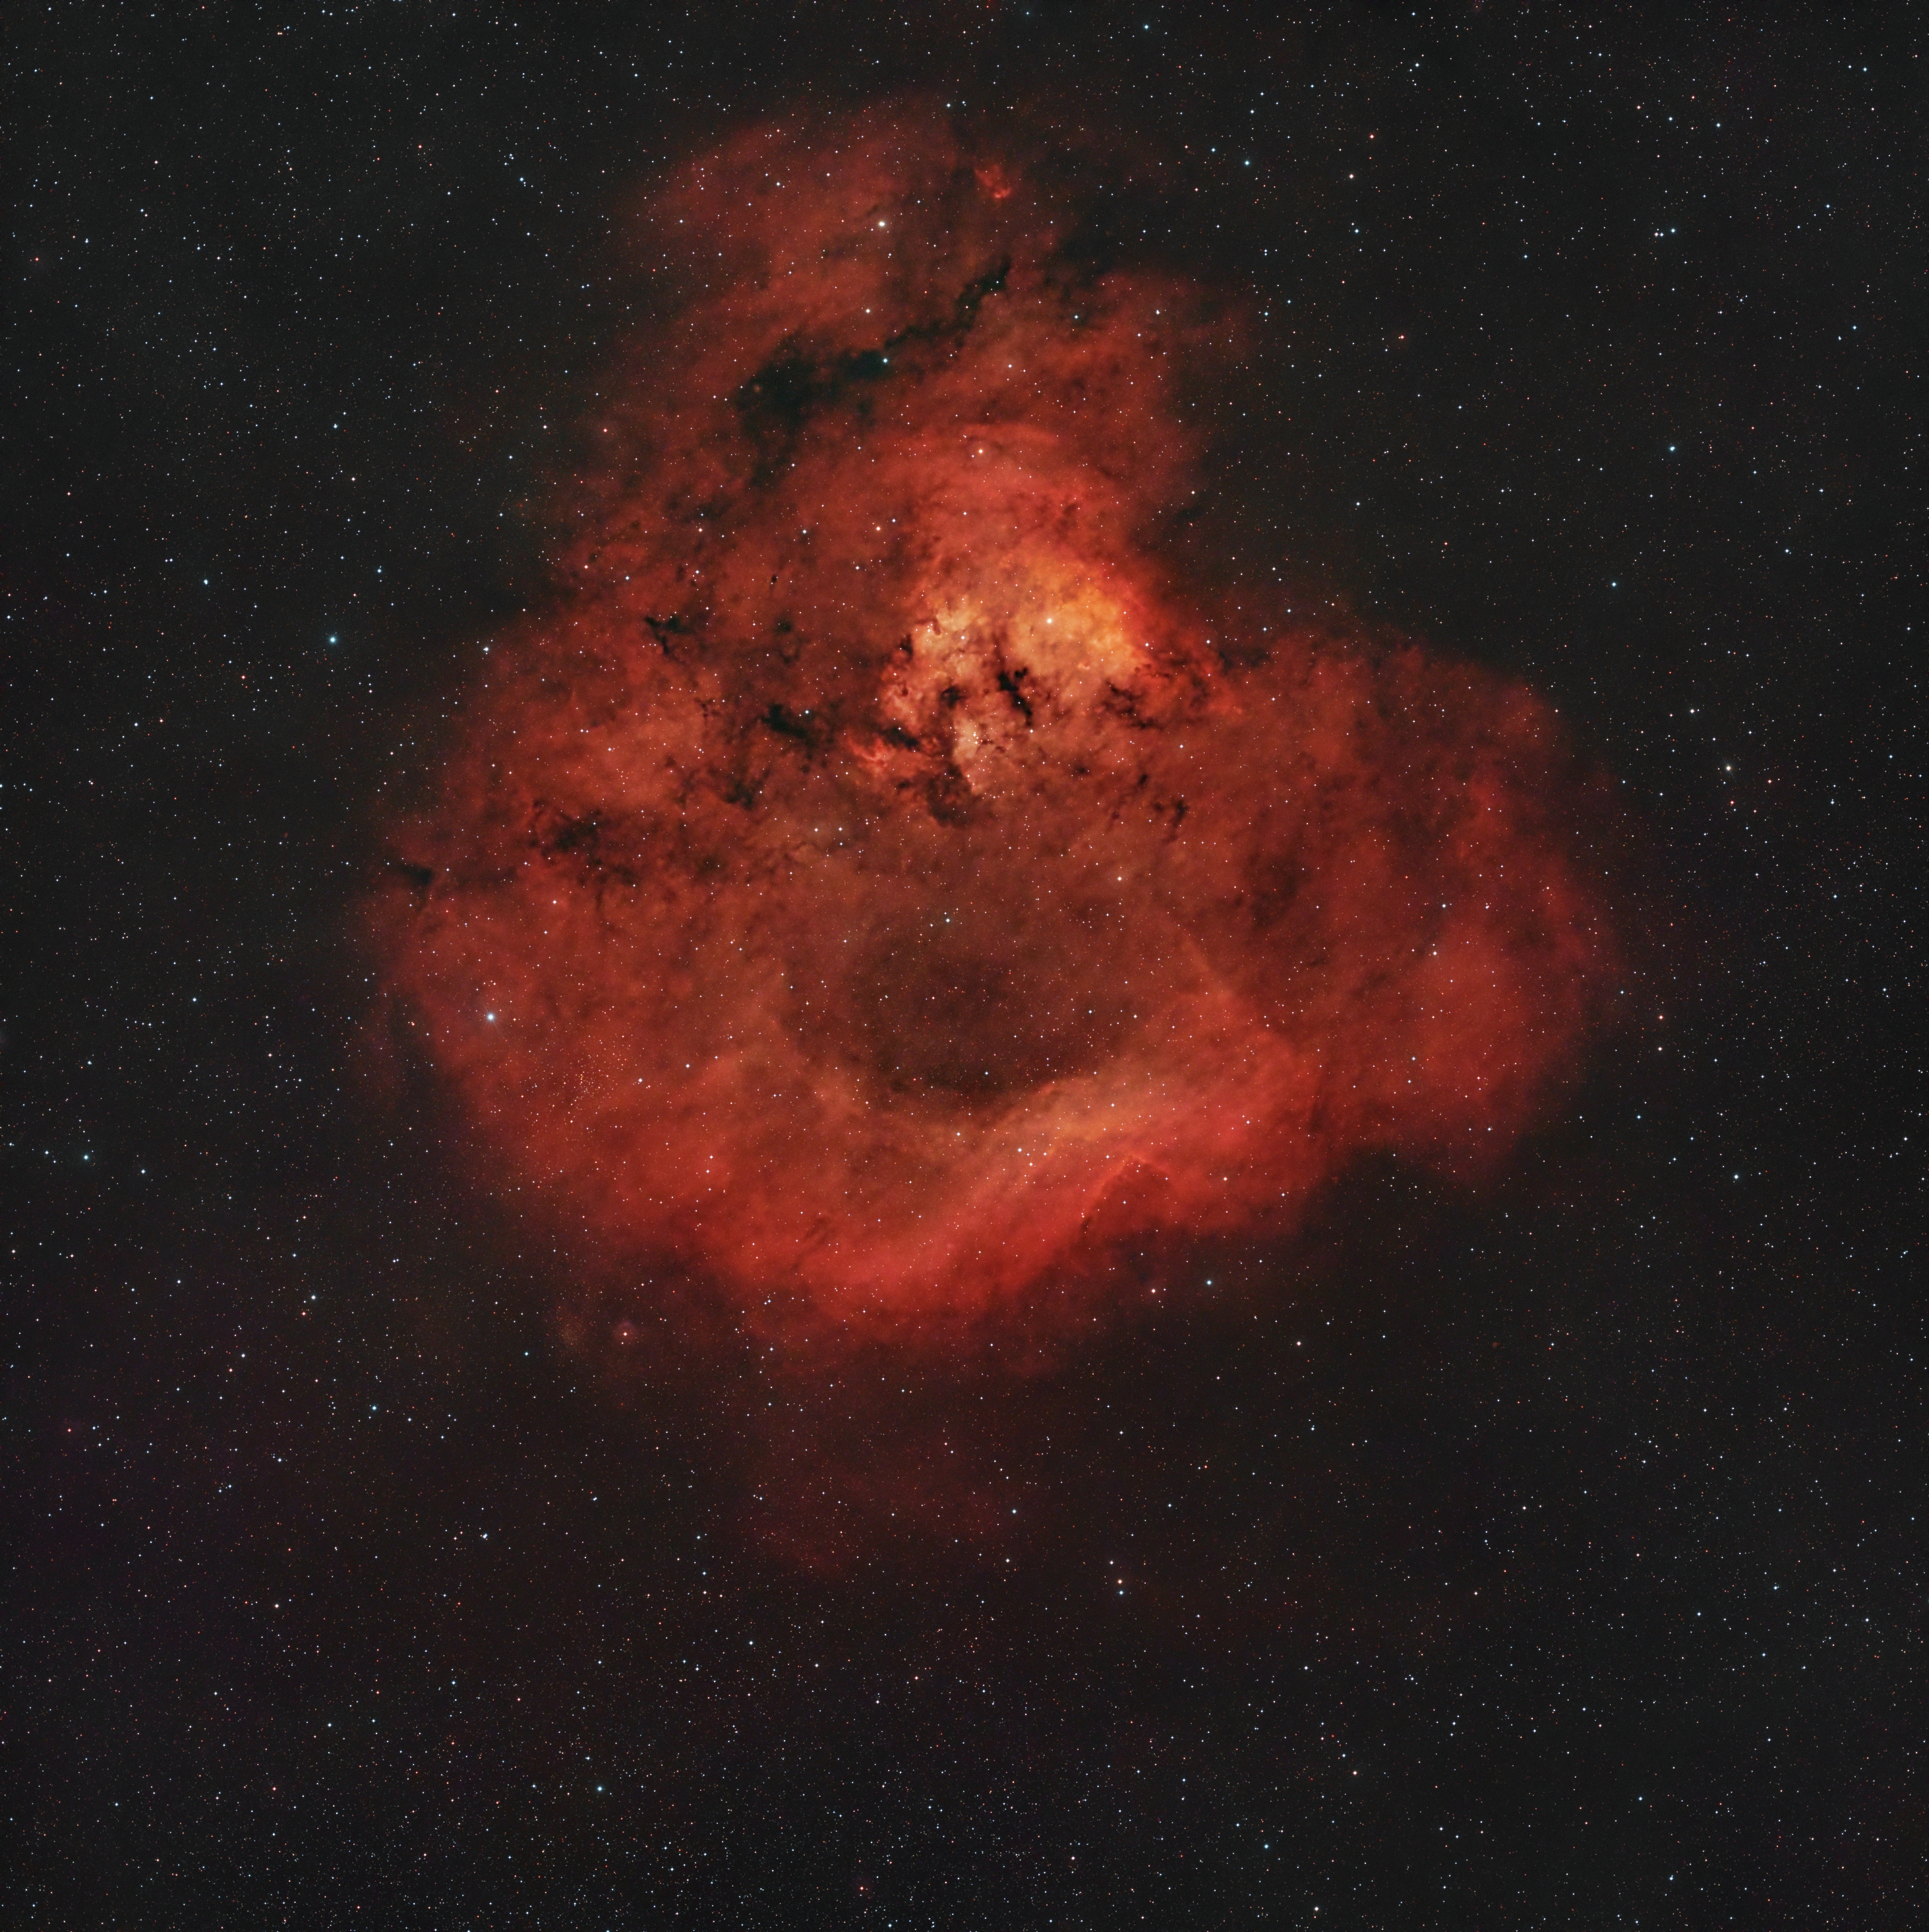
andrea tasselli:
Eric Gagne:
I don't mind at all. I invite you to download the data and show us what you do with it, that's what this thread is all about
Here it goes:
Processing description to follow (it's lengthy)...
*Description of Pre-Processing Steps*
1. ImageCalibration (with supplied Master Dark and generated Master Flat)
2. CosmeticCorrection (using supplied Master Dark with sigma=3 and Auto Detect on for both hot and cold pixels)
3. DeBayer
4. SubFrameSelector to reject low quality weight and low star count frame (threshold at 60 for quality weight and 2000 for stars) resulting retaining 156 frames
5. StarAlignment (with drizzle files generation on)
6. LocalNormalization (using frame 45)
7. ImageIntegration (with Local Normalization on both stacking and pixel rejection and weights from step 4 above)
8. DrizzleIntegration with 1x CFA drizzle and Local Normalization
*Description of Processing Steps*
1. Removal of linear gradient (Moon glow) by ABE with linear option (degree of interpolating function = 1 and correction by subtraction)
2. Image flattening with DBE, 55 samples per row, sample weight at 0.6 (in hindsight I should probably done it twice)
3. ImageSolver script
4. Color calibration with CC (did not use SPCC because with undersampled stars and NB filter yields red-skewed results)
5. Star removal with SXT
----------------- end of linear stage --------------------
6. Stretching with MaskedStretch
7. Further stretching with ArcsinhStretch
8. Trimming image range with HistogramTransformation
9. Denoising with NXT (50/20) on whole image
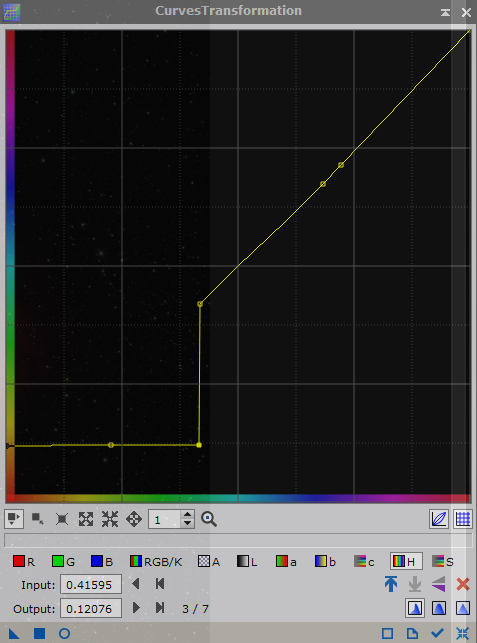
10. CurveTransformation to further reduce background but slight increase of the middle tones (RGB/K curve)
11. Mask creation to include all of nebula
12. Applied mask to deselect background
13. Applied B/G enhancement curve (CurveTransformation process) to highlight the OIII regions at the core of the nebula, twice
14. Further lowering of background with inverted mask and CurveTransformation followed by removal of mask and running BXT again (same parameters as before)
15. Stretching of stars image with HistogramTransformation followed by ArcsinhStretch (84)
16. Star color correction by hue transformation (CurveTransformation process):

17. Blend stars with nebula image (PixelMath)
|
You cannot like this item. Reason: "ANONYMOUS".
You cannot remove your like from this item.
Editing a post is only allowed within 24 hours after creating it.
You cannot Like this post because the topic is closed.
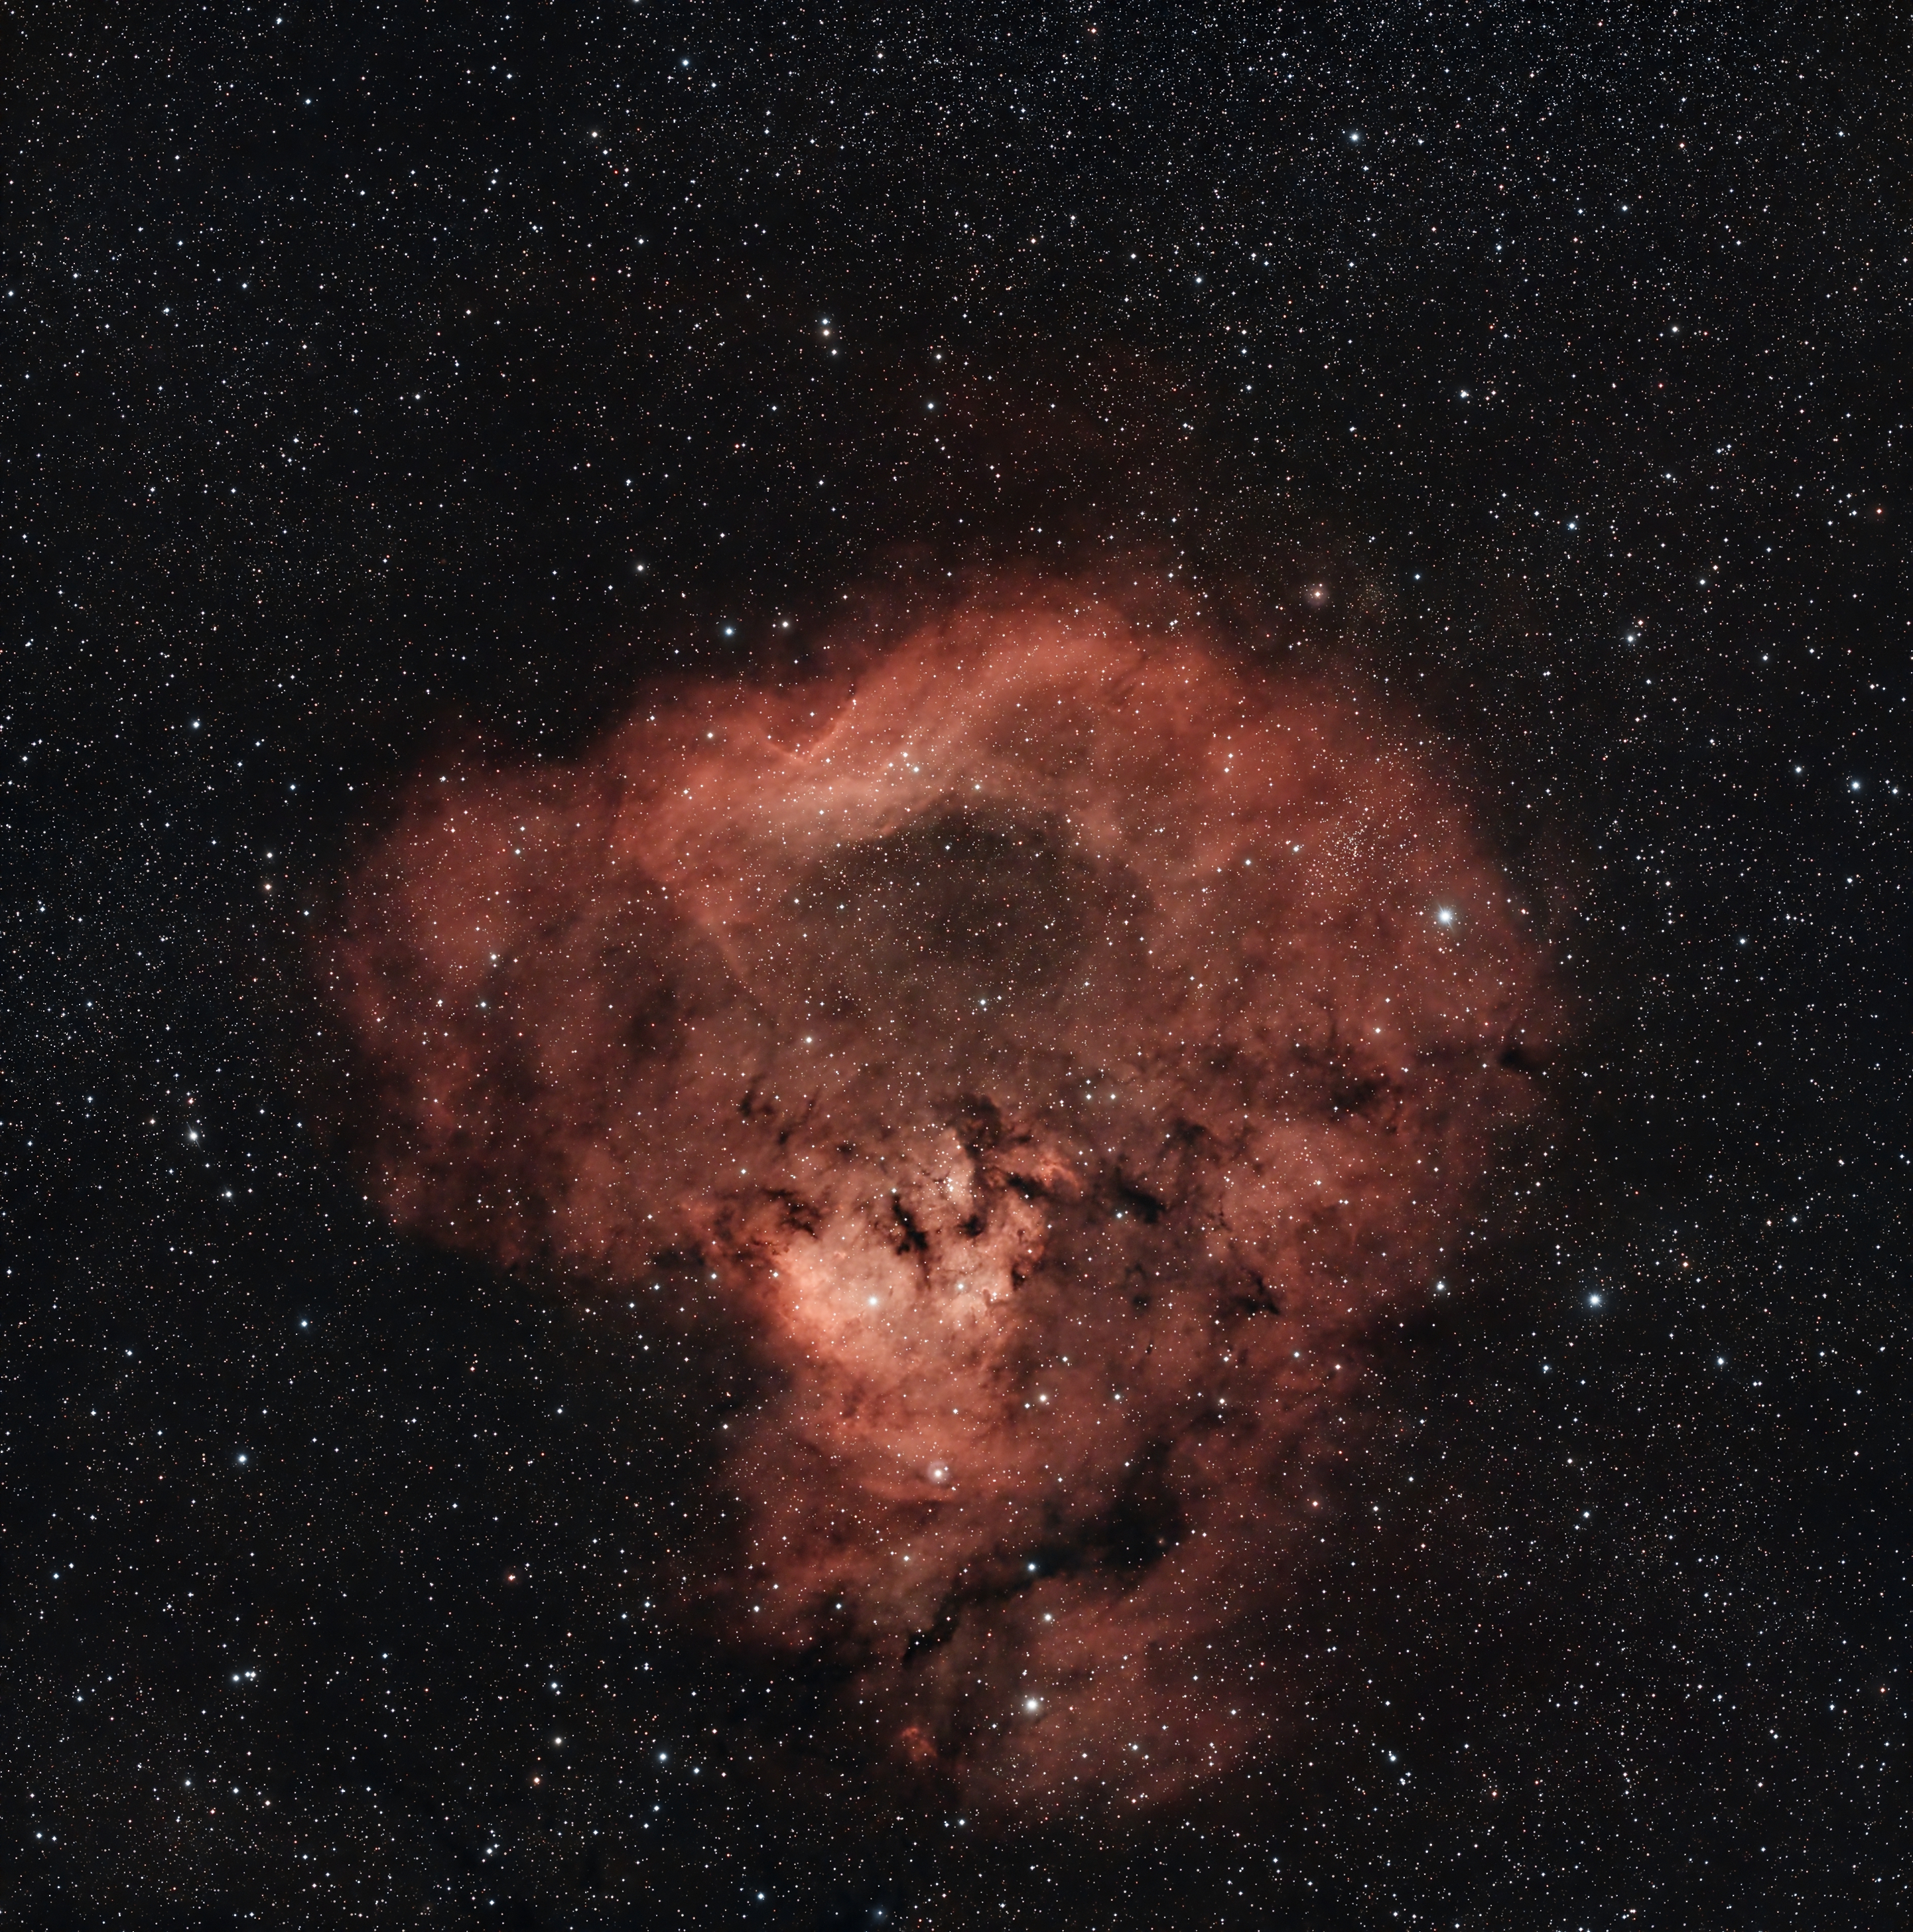
Here's my take on your data. Hopefully together with the PI process icon.
Process icon:
Egagne_7822.xpsm
cs
Wim
|
You cannot like this item. Reason: "ANONYMOUS".
You cannot remove your like from this item.
Editing a post is only allowed within 24 hours after creating it.
You cannot Like this post because the topic is closed.
With MMT applied to chrominance and use of a range mask, it's possible to reduce the colour gradient in the lower left. I used 10 layers in MMT and applied a negative bias of -0.100 and -0.150 to the 10th and residual layer. I didn't use a stronger reduction since that would require a better mask in order to protect colour in the faint nebulosity. This is just to show the technique.
 |
You cannot like this item. Reason: "ANONYMOUS".
You cannot remove your like from this item.
Editing a post is only allowed within 24 hours after creating it.
You cannot Like this post because the topic is closed.
I created a new version, sticked to H-a and recropped. I used a completely different workflow this time, I started from the integration and followed the method showed by Walt from Delta Astrophotography at (3) PixInsight Processing For Beginners - YouTube
Only different was I stretched and curvec myself because EZ Processing is no longer available.
 |
You cannot like this item. Reason: "ANONYMOUS".
You cannot remove your like from this item.
Editing a post is only allowed within 24 hours after creating it.
You cannot Like this post because the topic is closed.
You cannot like this item. Reason: "ANONYMOUS".
You cannot remove your like from this item.
Editing a post is only allowed within 24 hours after creating it.
You cannot Like this post because the topic is closed.

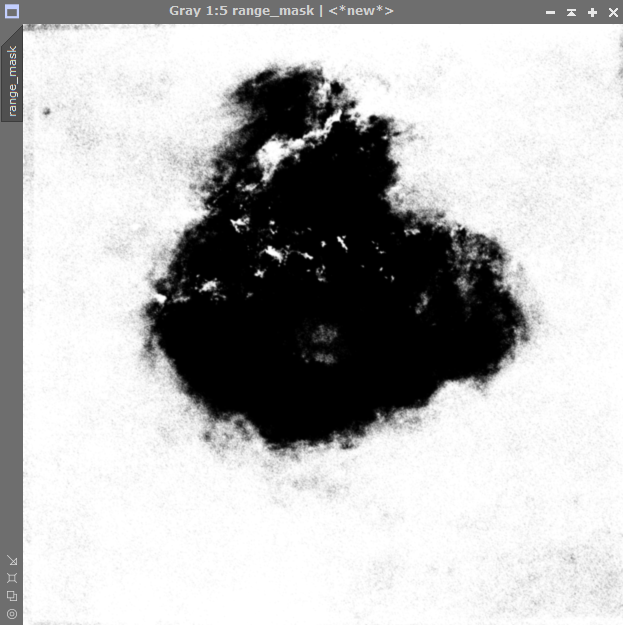
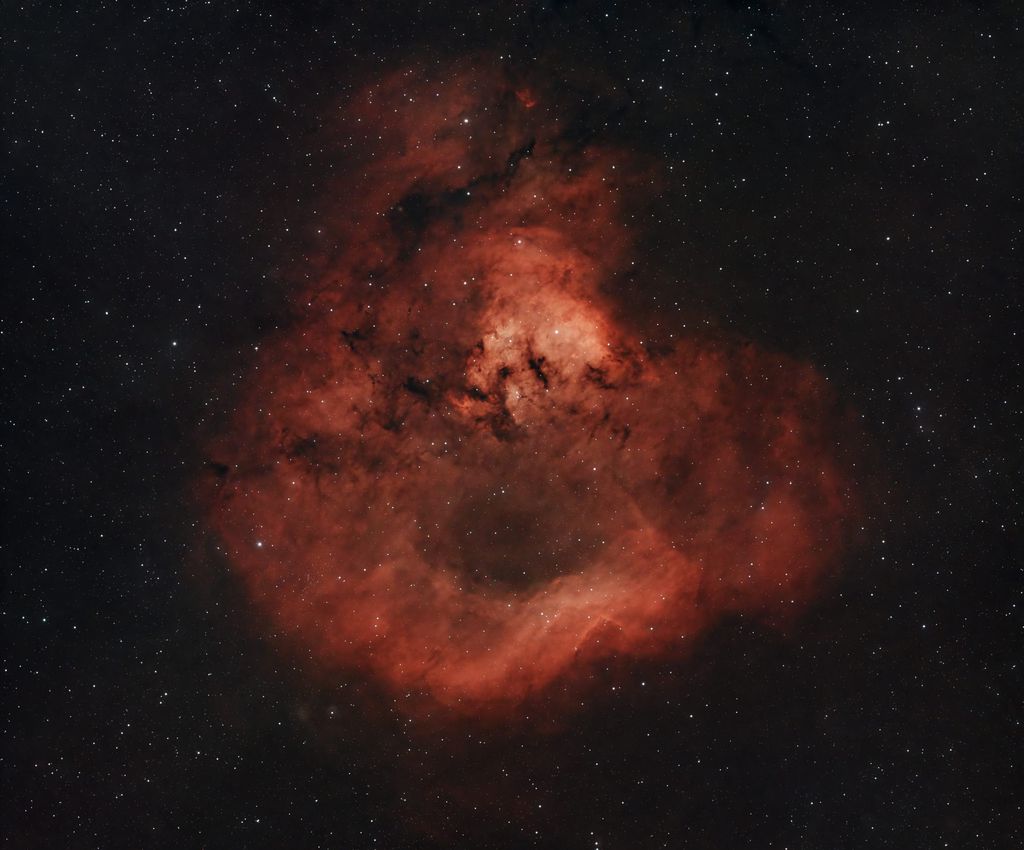
@Eric Gagne thank you for the data. This is my attempt on processing it.
So, as other stated, drizzle is the key for removing that hot pixels easily. Even so, Cosmetic Correction did help me to remove them in WBPP.
About the work flow, it is the one I use for my images. It consists on:
- Background extraction. I use DBE, ABE or GraXpert. Last one in this case.
- SPCC.
- BEX.
- NEX.
- SCNR.
- GHS.
- Remove stars.
- Range mask for the nebula.
- LHE on the nebula.
- Invert the mask so I can adjust the background brightness.
- Rescreen stars.
I did remove about 30 frames due to eccentricity or clouds.
I enjoyed processing it so, if it is OK to you, I would like to upload it to my gallery, referencing your gallery.
P.D. I see my version is rotated 180º compared to yours. It was not my intention. That was the original rotation after WBPP with plate solving.
CS,
Guiem.
|
You cannot like this item. Reason: "ANONYMOUS".
You cannot remove your like from this item.
Editing a post is only allowed within 24 hours after creating it.
You cannot Like this post because the topic is closed.
Guiem Kimi:
I enjoyed processing it so, if it is OK to you, I would like to upload it to my gallery, referencing your gallery.
CS,
Guiem.
Of course, by all means. The result is your own work and it's very nice, worth sharing.
Thanks for trying it and sharing your workflow.
|
You cannot like this item. Reason: "ANONYMOUS".
You cannot remove your like from this item.
Editing a post is only allowed within 24 hours after creating it.
You cannot Like this post because the topic is closed.
to create to post a reply.